Showing posts with label Baby. Show all posts

Tuesday, November 27, 2012

Swoon: Animal Prints for Playroom


The only work I seem to be getting done is ordering things for the house. (Not that I'm complaining!)  Thanks to Black Friday and Cyber Monday and a variety of saved up coupons I got a few cute deals for the house the past few days. 

Today's Obsession though was sent to by inbox by B from Practically Crafty. She sent me the link to The Animal Print Shop. They are having a holiday sale to buy 3 prints and get one free. These are just what I have been looking for to finish off the Playroom. (I'm using the word "finish" liberally because I always seem to find something else to include!) Even if you don't need any animal prints you should head over there to check them out - they are sure to make you smile. 

Anyway, these are adorable animals and my little one is totally obsessed. They also recommend some frames to achieve the look they have. The recommendations range from Ikea to Restoration Hardware  (Just click the "framing help" link on the lower left hand side of the page.)  Pottery Barn had free shipping yesterday and I had a 10% off coupon that was about to expire... so I ordered some cute white frames for my little animals. You will have to wait and see which ones I ordered. 

 Now if they would just finish the carpet downstairs I could move on with my projects down there... 


Happy Crafting! 

Monday, November 5, 2012

House Update... One of Many


We have so much going on at the house! So, just a quick update to show you a few of the changes around here.

Mud Room/Front Entry
We found an amazing carpenter who has made a few of my visions come true. I don't need to tell you that there are more then a few pictures of mud rooms on Pinterest that have made me drool. Tonight Chris, our carpenter, finished our mud room in the entry! I still need to install a few hooks under the cubes to finish it off. I love how the shoe rack underneath is hidden. I don't have a before picture, but it was basically a big open space.

 I previously had a shoe rack/bench from Target in the front room, which has found a new home by the back door. In its place is this fun red chest from Ikea. (A huge thanks to my sister, who was visiting and put it together with minimal help from my husband the evening we brought it home.) I'm still debating what should go in it (and on top of it), but I'm loving it as quilt storage for now.


The Nook After
 The Nook 
After my last post about "the nook" I was encouraged to remove the silver vase and insert more picture frames. (Thanks K.A.) I am so glad I listened. I think it is looking much more put together now.
The Nook (from House Tour)

I'm including the picture I took from our house hunting trip because I remember thinking, "what in the world am I going to do with this!" 


 The Great Lighting Switch
I had a friend in town who used to work for Habitat for Humanity. I convinced her to help me (uh... my husband) switch around the lights in the house. Nothing went as planned, so we are just grateful that no one was electrocuted. I did however get new lights in a few places.

Kitchen Fan now in Blue Bedroom
Blue Bedroom Before
 Anyway... the blue fan from the kitchen found its way up into the now blue "big boy" room upstairs. This is good for several reasons, one of which being we don't have central air and a fan on the bedroom level really helps things. We have done minimal work on this room, since H is still in his crib in the nursery, and will be there quite a bit longer. I have repainted the room. (See before picture from our house hunting trip.) My In-laws also repainted all the pockets in all the closet doors that had been painted in the house. I think i want to do roman blinds in this room but need to (a) figure out how and (b) find a good fabric.

New Family Room Light
The lighting in the living room also got an update. This is the only spot for a ceiling fixture in the room, so I needed something that produced more light. Also, the other fixture was blue and there is already a lot of blue in this house. So... out came the blue fixture and in came the new, brighter, more neutral fixture.

Finally the kitchen (which had wires dangling for a few days while we waited for our order to come in) got a more modern, more kitchen appropriate light.  I think this will mark the temporary end to changing out lights. I have two large lights in the front room that I want to replace with something more modern, but the husband has made it very clear he won't be doing that! So I either have to wait till he forgets or, when I can't take it anymore, I will hire someone! In the meantime I'm on the lookout for new fixtures ... a girl can dream.

The Weird Basement Room/Soon to be Office

Basement Room Before (Not our TV)
Thursday's Progress
When we purchased the house there was this small room in the very back of the basement that I had no idea what to do with. You can't tell from this picture, but the wood actually has these little carved leaves all around it and behind it was some sort of cloth wallpaper.

The redeeming factor was that this room has a great little window that looks out over the back yard... perfect! When H is a little older, I would be able to sit in this room while he plays in the yard.

Cue our amazing carpenter and a few pictures from Pinterest.  I'm getting a built in desk, book shelves and WINDOW SEATS.  I'm in love! Here is a little sneak peek of the work so far... although I'm told they are going to be done by the end of the week!

Friday's Progress


Upstairs Playroom
Ikea Lantern
Lots of little changes in this room. The hardware board continues to grow with every Home Depot trip. Our new favorite activity, in addition to our old door bolt, is the level that has been attached to an eye hook. A small pulley system is also now on the side of the board.

Hardware Board
An Ikea lantern and an old plant holder and a electric candle create a fun little lighting situation over the bookshelves.

Ikea Rug
A new rug on the floor brings a forest floor to the playroom and a fun place to play with toys. (H hasn't really noticed yet, but a few older kids that have come over to play have been particularly taken with the animal tracks.)
Zebra Ikea Print

Another great Ikea find is the zebra print for the large wall in the playroom. I saw this in someone's cart at the Ikea and was so in love, I hardly noticed that it would barely fit in my car with my other purchases. Thanks to my sister though, we made it fit.


The Downstairs Playroom
Old Storage Area Understairs
This used to be one of several basement storage areas, but it is soon to be another play area for little H. I don't have firm plans... but today I picked out paint colors and set my husband to work. The woman at the store said she wasn't sure why anyone would want to purchase the colors "fire" and "squash" ... the jury is still out, but with no windows I was hoping for something warm and bright. It's certainly bright... it's wet in the picture and mellows out quite a bit. You will have to stop by again to see the finished project.

Also in my garage are a variety of objects that got several coats of paint today....but you'll have to wait to find out what I have in store for them.

Happy Crafting!


Tuesday, September 11, 2012

2012 Halloween Costume: Penguin Hat & Feet


I honestly had no idea I would find time to finish this costume today. I stared way early thinking it would take me several weeks to find the time to finish this project. Pottery Barn Kids Story Time (or lunch with Jessica) must have really worn H out though because when we got home he took an almost two hour nap and I seized the opportunity to finish his costume.

Again, I just followed the instructions from Ashely over at Make it and Love it, with a few modifications. The hat was easy, although I made two sizes because H was napping and I wasn't sure how it would fit his head. I also sewed all the face pieces on before completing the hat, thus eliminating the need to work inside the hat.

The feet also came together really quickly. Instead of putting the stuffing right into the part I made the shoe a bit more like a slipper. I cut out 6 flipper pieces, instead of four. I made one set of them slightly smaller. I sewed the slightly smaller one together with the one that was going to be the bottom (not the one with the hole) and stuffed that one with batting and closed the hole. Then I followed the directions just as given to attach the piece with the foot hole and the elastic. They are like little felt slippers. H certainly could not walk around in them... but he doesn't walk so it won't be a problem.

I still need to attach the bow tie - but it is made.

I put H in the costume just to make sure everything fit and nothing was going to bother him. He seemed to have a great time playing in the costume - and here are a few pictures of him trying to figure out what his parents had done to him.


(His flipper had fallen off by the time that I took this last one ... haha)

Anyway, after our costume dry-run we got our act together and went to the Pikes Peak Trilake Public Library to get our library cards. They have a huge collection of online music, online books and lots of activities at the library. I think we will be there quite a bit!

I'm hopefully going to get to work on Jeff and my costume next... I'm going to attempt to find a few of the pieces so I don't have to make them all. We shall see.

Happy Crafting!

Sunday, September 9, 2012

Making a House a Home

I've finally found a bit of time to share a few of the projects we have undertaken in the first month in Colorado Springs. I have some big "plans"  (aka Pinterest boards galore) for the house and have come to terms with the fact that it is going to take me a while to get everything just how I want it. So far we have had 6 house guests and I've changed a few things between each of their visits.  Also, I've been putting this off because we have been without end tables... but on Saturday we found three perfect ones!

It's my blog, so I only have to show you the rooms I'm done with and you can just wait and see on the other rooms. Without further ado...

The Playroom 

 This is one of the rooms that has a whole Pinterest board dedicated to it, but I am so impressed by how this little project turned out, I had to post it! Here are the instructions from i heart organizing.

My bench is actually one block shorter then the one from Jen's blog. We had an issue with size and covering heating vents. I wanted the bench under the window, so instead of building a wooden corner piece we just overlapped the shelves - we have 9 storage spaces instead of 10. The storage bins are fabric and from Ikea. Jen used the plastic ones from Ikea, but I didn't love the feel of them.  The fabric fit our purpose for now and are better since H is less likely to hurt himself on them.

The pillows are from a previous post and were in the nursery in the last house.  A few items have been re-purposed, including the diaper holder.

We have switched to cloth diapering and love it. However, now I don't need a diaper stacker. It has instead become a place to store some of H's animal friends and it fits our jungle theme for the play room! I have a lot of work left to do in this room, but at least now I have a place to sit while H plays on the floor and have plenty of storage space for toys.

The Family Room 

This is currently my favorite room in the house. I love how we all fit in it. Jeff can be watching football, H playing on the floor and I can sit by the window to read - all without tripping over each other. (Can you tell I was in base housing for too long! haha.)

The major project here was the wooden curtain holder over the big window. (I had to close the shades for the picture, but it has a beautiful view of the mountains.) The former owners had really dark fabrics up on these valances. I loved the polished look of the wood, but hated the fabric choice. In this room I used valances from our old house and reupholsterd it. (Thanks to my husband's staple gun, it was an easy fix.)  I'm not sure about what I want on the mantle yet, and I'm considering finishing the mantle so that it extends to the floor, but for now its nice to have a living space that feels finished.

The Nook 

This little nook is right outside our bedroom. I couldn't figure out what in the world I would do with the nook until I saw this piece of art at Pier One. I'm still debating if I love the vase there, but otherwise I love how well this piece fits there.

The Nursery 

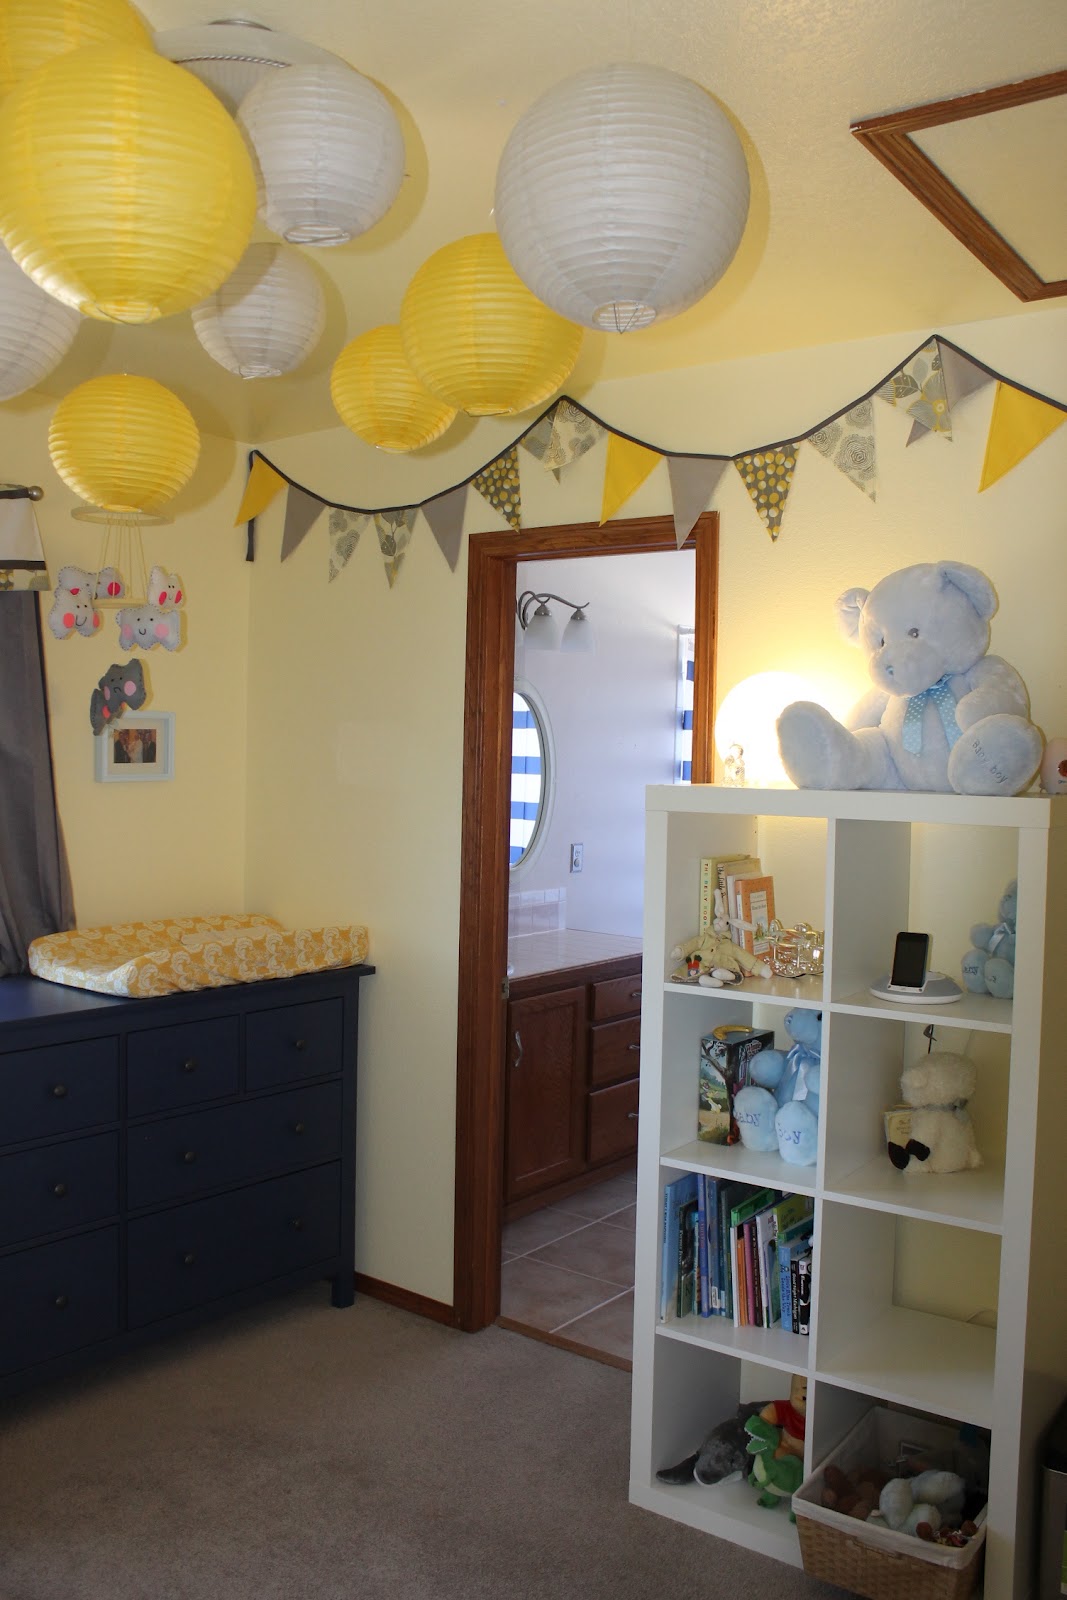
I am so happy with how this room came together. The room was already painted yellow when we got the house. I was able to use a bunch of things that B from Practically Crafty made for my shower. I converted the table runner she made into a valance, I used the flags as wall decor and reused the lanterns.

I love the little collection of things over his crib - from invitations and pictures to little hand written notes, it really brings H's personality to the room. And I know you are not suppose to have bumpers! By 4 months, H was rolling all over the place and we were constantly finding him with an arm or leg between the slats... so bumpers it was. I tried the "breathable bumpers" and hated how they looked and how they felt. H was able to get stuck between them and the mattress because of how they connected. They also said "one size fits all" but we never got them to fit quite right in our crib. These bumpers are excellent and are from Carousel Designs. They are beautiful and lined with the softest fabric - we have had them for a few weeks now and love them.

I have one little spot on the wall there by the bathroom door that needs a little something... too many cute options, so I'm sure I will find something cute.

H's Closet

Another find from I heart Organizing. Jen had used an Ikea Expedit bookshelf to add additional space in her boy's closets. (See her blog for instructions.) We needed the additional storage and hanging room. The built-in wood shelf made the Expedit too tall for this closet. Instead we used the Expedit 2x2 shelf with amazing results. The extra hanging room is perfect and leaves us with four shelves that H will eventually be able to reach. When H is a bit older, I plan to add storage like Jen did in her tutorial.

Here is another close up:


As you can see, we have been quite busy. I have a handful of other projects up my sleeves so I'll keep you posted. I also have been hard at work on H's halloween costume and hope to have a preview of that soon. Until then... Happy Crafting! (and one last picture of H!)


Tuesday, July 10, 2012

Favorite Things: A Baby Shower Gift

Favorite Things Baby Shower Gift.
As you know, my dear friend K is having a baby boy, due any day now!  She had a lovely shower in Birmingham, Michigan that I attended with little H and my sister. I wanted to do something really special for her. I know that most of her friends have much older kids or no kids at all. Even though I only have 2 months experience, at Edwards, AFB I was surrounded by moms with great product advice. I created a little "favorite things" bag for her with some of the small products I never would have learned about without the help of these moms.

I'm sad to say I did not take a picture of the final product - but the picture above was what I had collected before I left Atlanta for the shower. We made a quick Target run for a few items once we arrived in Michigan. My sister also picked up a few adorable things from the Congressional Gift Shop. (She is a Congressional Staffer and K and I spent many summers in DC, so it was a nice personal touch.)

For each item, we created a little label out of a note card. I bought some scrapbook baby stickers to put on the note card, along with whose favorite thing it was (Mom, Dad or Baby) and something cute about the product. (For example: the card on the links read "Baby's favorite thing - I love to suck and chew on these plus they hold my toys so they don't fall on the floor. You can never have enough.) I've actually used everything I gave her, so I could honestly recommend them.

The whole thing came together nicely and was really cute when she read them all out loud at the shower. I wrapped some of the items and left others completely unwrapped. I packed all the items into an L.L. Bean Tote with the new baby's name on it.

You could do this with your favorite things, but my bag included: the L.L. Bean Tote, Inch Bug Bottle Labels, Inch Bug Fabric Labels, nursing cover, a Gownie (to wear when she gets home, not at the hospital), Links, Stroller Toy, Extra Onesies, The Pantone Color Book, Art Cards, Arm & Hammer Trash Bags and Carrier, a lovie (sports themed to go with her nursery) and peepee teepees.

Now I just have to wait for K's little boy to make his arrival. Until then, here are a few of my favorite things up close and/or in use.

My Favorite Baby Product!

Art Cards!
Pantone Color Book
Monkie Lovie!

Tuesday, June 19, 2012

Baby's First Facebook

Why is it that you feel so successful after completing a Pintrist project? I did allot of pinning while I was pregnant with H. I am just now getting around to accomplish some of those projects. As I've mentioned previously, it is a bit challenging since I have the little one and I am geographically separated from my craft supplies.

 A photo-book project seemed like a good place to start. I could do it from my computer and all it required was making sure I had all the digital pictures I needed uploaded before we left California. The project I found on Pintrist had you cutting and pasting pictures onto an old board book. I decided it would be easier to just have one printed by one of the many photo-book companies. I chose to use Shutterfly because (a) they almost always have great sales on their books and (b) they offer a great variety of little stickers and such that you can use to spice up the book. I've also used Snapfish in the past to make photo books after our long trips but have been happier with Shutterfly's options for baby books.

The first project was an ABC book for Henry that I actually finished before he was born. I used photos from our travel adventures (which you can read about here) to illustrate all the letters. Shutterfly already has a template for this type of book which made it easy to do in the last few weeks of my pregnancy. He is still a little young to really get it - but he loves looking at all the bright colors. We like it because we can tell him stories about all the pictures making it sort of a story book as well.

The Facebook took me a bit longer. I collected good pictures of everyone's faces (and as many as I could of people with H) and put them into a book highlighting the faces of his family and friends. H loves to stare at the faces. As an added bonus, it will help him remember everyone later in life since, as a military family, we are often far away from our family and friends. This project was well timed since we are spending the summer so close to many of our family and friends.

I've posted previews of the books bellow for your perusing pleasure. With so many photobook ideas on Pintrist I will certainly be making some more in the future.

Happy Crafting!


Create a gorgeous, high quality wedding photo album at Shutterfly.com.


Shutterfly baby photo books are the perfect way to preserve your baby's precious moments.

Friday, June 8, 2012

Craft-tastic Gifts!

So much has happened since I last posted.


First, I had my beautiful baby boy, little H, and now I feel like I have so many new projects I want to start for him and have had exposure to so many great new products that I can't wait to post about.


Second, we've moved! That's right ... we finally got out of Edwards and are in route to Colorado Springs. We have had a brief detour to the south for two months so the husband can attend Squadron Officer School in Montgomery, AL. This detour has left me separated from my craft supplies but provided lots of opportunities for new adventures. (Which you can read about on our family travel blog.) As part of our send off our dear friend made these adorable cookies for all people leaving the squadron and the blue airplanes for all the new arrivals. Leaving Edwards was bittersweet and we will never forget all our wonderful friends there.


Third, we are under contract on a house in Colorado Springs. The house is adorable and is in need of just a little TLC. I'm so excited about some of the projects for our new home and am thoroughly enjoying pinning every possible idea I can find to my Pinterest boards.

Fourth, I got a new camera! Yes, my husband celebrated the arrival of our new little one and my 30th birthday with an SLR camera (a Cannon T-3 Rebel.) My parents then presented me with a 50mm lens. This sucker has let me take some adorable pictures of H and hopefully will help me take better pictures of my "projects" as well.  (Look at how cute our little guy is!)

Needless to say we have allot going on around here and very little of it has involved me getting projects done. However, little H's arrival has sparked some adorable projects from other people.

My mom, an avid crossstitcher, produced the most adorable birth announcement to hang in H's room. She finished it up in the hospital with us once we decided on little H's name but brought it back to Atlanta to have it framed. She presented it to H at his baptism a few weeks ago.


My good friend B, over at Practically Crafty, has been busily crafting away for my little one as well. She made an adorable bootie/sweater combination for little H. Unfortunately little H is quickly becoming big H and I think he is going to outgrow the sweater and booties. Thanks to Pinterest they are destined for a frame in his room to remind us how little he once was.


B, in all her wisdom, also sent me some crafts I could complete here which will be prefect for my weeks spent in Alabama. (When I'm not taking pictures of little H!). Happy Crafting!

Sunday, March 25, 2012

Nursing Cover


I'm T minus one week to my due date - the nesting instinct has fully kicked in and I'm coming up with a handful of little projects. I don't want to start anything too big because I know having a half finished project when I go into labor would make me crazy.

Today's little project was a nursing cover. I found a few patterns online but none seemed to be exactly what I wanted. I was given a used "hooter hider" and decided I could just use that to make my own.
(In the picture bellow the red and brown one I used as the pattern.) It is a really simple project. I added a full pocket, made form a wash cloth to the bottom left corner. I also added some length and width which will help if I use it with my breast pump. I also lined mine which made a few of the steps easier and gives it a really pretty finished look. I need to take better close up photos but these will have to do for now.


I have a few quilts that I am finishing up - read hand binding very slowly - so hopefully pictures of those will come soon.


Monday, March 12, 2012

First comes Marriage..


Way back in June my best friend, K, from college got married in Detroit. I promised her a quilt for her wedding, but I let her pick out the fabric (we have totally different tastes.) Well, the fabric K picked was delayed and then we were traveling and then I was pregnant...this quilt just has been trouble from the start! I'm pleased to announce it is finally done. I just pulled the quilt out of the dryer! It is certainly different from my typical bright and modern quilts, but I think she will really love it.


The quilt is finished just in time because K will be welcoming a little boy in August! I wanted to throw a few little things in the box for the baby (my soon to be Godson!) so I threw together a stuffed whale and tagged blanket for her little one. I may make a baby quilt for her baby shower..we will have to see how much time I have once our baby arrives.


Oh - my husband asked for a cover for his Kindle to protect it when he throws it in his bag. I threw together this little quilted case from some scraps. Unfortunately, I don't have very many manly scraps so it is a bit girly. It will just have to do for now.