Showing posts with label Home. Show all posts

Wednesday, March 6, 2013

Fireplace Update

Fireplace after. 
The fireplace has been on my list of updates since we moved in. It took me a few months to put my finger on what I didn't like. First, I looked for a new grate - but couldn't find one. Then when I found one I realized I could probably replace the whole fireplace for what they wanted to charge me for just a grate. Back to the drawing board!

 I considered trying to frame out the mantle. Again, more expensive then what it is worth.

 Then it hit me, I didn't like the gold. Cue heat resistant paint for grills. (I used Rust Oleum.)  I pulled off the cover.  My unwilling assistant, my husband, removed the gold flaps and I spray painted them black. (My husband may have done a few coats of the spraying when it got too cold in the garage.) I let it dry overnight before my husband reassembled it. What a difference a few coats of paint make!

Fireplace before. 


Tool Bench & Belt


I found this great tool bench on Zulily a few months back and it finally arrived. (I love Zulily, but things always take forever to come!) My lovely husband put it together and we both had fun playing with the tools, brackets and gears that came with it.

Anyway, while he was unpacking the box, I remembered that I had some tool themed fabric. A quick Pinterest search for inspiration and I was set to make a tool belt.

I didn't really follow directions for the tool belt. (There are some directions available here.) I had some left over brown fabric and a fat quarter of the tool fabric and two different colors of brownish bias tape. By the time the tool bench was together the tool belt was ready to go!

Felt Letters

Mailbox and Painting on wall outside Play Kitchen. 


Much too cold to go outside!
Our little guy loves to check the mail. When it's not snowing or cold outside, we open and close the mailbox over and over just for fun. I figured a playroom mailbox would be a warm option that H could grow into. So off to Home Depot we went and found a mailbox for under $20. I considered spray painting it a fun color, but I wanted to get it hung. My husband mounted it on the wall near the door into the play kitchen.

Now...what to put in the mailbox? I had seen some adorable felt letters on Pinterest. I pulled apart an appropriate size envelope (A7 is what I had) to use as a template. I cut the felt, sewed on a little stamp and doodles for addresses and sewed together. Tada -Instant Mail. I had a few little pieces of felt left over to make a heart or two to go inside the envelopes.

I'm sure we will spend tomorrow pulling the letters out and putting them back in - but at least we will be nice and warm inside!


Thursday, January 24, 2013

Playroom Art Area


It's nearly the end of January and I am still in a holiday crafting slump! I did finish the basement art area - spurred by the immanent arrival of dear friends and their three children. I wanted them to have plenty of space to play while they were here, and it's been on my list to finish for a while.

The art area has lots of space for drawings or inspirational pictures. Old frames from our local frame shop (they gave them to me, since they were going to toss them) found new life with a coat of spray paint. I found some smaller frames on Etsy through TheBumbleintheBee. Some fun binder clips from Target hung on nails provides a way to clip all sorts of items into the frames. 

We ended up with two rather large frames. One was filled with a piece of leftover board from our garage organization project, which I painted with MANY coats of chalkboard paint. It works great - as long as you use a wet cloth to erase the chalk and not an actual chalk eraser. 

The other frame was filled with a piece of sheet metal from our local Home Depot. (Thanks to all the nice folks who helped us find the right kind of sheet metal - i.e. walked around the store with us trying out different magnets!) We covered the sheet metal with a piece of fabric before gluing into the frame. 

And of course there is the crayola project and the dog painting. (The dog painting was completed at a girls night with Paint the Town .) 

Sunday, December 2, 2012

Christmas Banner Garland


This is another project I really thought about purchasing from Etsy. I couldn't find exactly what I wanted. I wanted something bright to match the rest of my house decor   A trip to Hobby Lobby and a 50% off Coupon inspired me to take a crack at it. I figured if mine didn't turn out I could always just buy one.

Here is what I ended up using.
Banner Pieces (Something like this or cut your own) Modge Podge 
Foam Brush
Ribbon
Scrabpook Paper ( I used sheets that were already small. similar to this)
Scissors
Single Hole Punch
Stick on Letters

This project is very simple, although it will take you a full day since the Modge Podge takes a while to dry.

First I glued the scrap book pages to the banner using the Modge Podge. I found it was easier to glue them on as whole sheets and trim once the glue had dried. I also noticed that my banner pieces were curling slightly. Before I trimmed them, but after they were dry, I stacked them under a large book and that seemed to solve the problem.

After each one is trimmed you will need to re-punch the holes through the paper.

Next apply the stick on letters. Now using a foam brush (a regular brush will leave stroke marks) apply a thin layer of Modge Podge over the entire banner and allow to dry. This will protect the paper and make your banner look nice and shiny.

Finally, run the ribbon through the holes and hang. Mine were light enough to hang with just a piece of scrap paper.


I think I may use this same technique to make a birthday banner.... one all my holiday projects are complete.

Happy Crafting.

Thursday, November 29, 2012

Christmas Yarn Wreath


I've become obsessed with wreaths after my fall football wreath turned out so well. (I swore off wreaths a few years ago when I tried one from Martha Stuart and it was a hot mess!)

I was trolling Etsy and saw this adorable Christmas Yarn Wreath. I almost pushed the purchase button, but couldn't get over the sale price. I knew I could get all the "ingredients" for so much less! So I took a stab at making my own. It was a quick and easy project. I may even consider knocking out a few more for gifts.

All you need is a wreath form, either foam or straw (with plastic on) will work, yarn and coordinating felt, scissors, and a glue gun.

First, tie the yarn around the wreath form and start wrapping the wreath foam in yarn - and just keep wrapping. You want it to be very tight. Every once in a while push it all together to make sure it is nice and tight. (For this one I wrapped red and white yarn at the same time.) Once you have the whole wreath wrapped, tie of the yarn again and cut it loose from the spool.  (This is where my little one thought it would be fun to help out and unrolled a whole spool of yarn. He was laughing so hard the whole time I just couldn't stop him!)

Now all you have to do is add decorative felt flowers, or other establishments. There are lots of video and blog tutorials out there on how to make felt flowers. I cut circles of varying sizes into spirals and then wrapped them back up, secured with hot glue and a straight pin. I looped some ribbon around the body of the wreath, secured with one straight pin, and hung it on the front door.

Go get some yarn and make your own.
Happy Crafting!


Tuesday, November 27, 2012

Basement Office Complete with Window Seat and Corner Desk


The basement office is complete... Well, I need to get a few more things on the shelves, get the computer in there, procure a chair, make roman blinds...  Yea. It is not quite done. But, my husband is reading to my little one on the floor and  little one is pulling all the books off the shelves. Basically. all is right with the world!  (Sorry about the pictures, they are from my phone.)


I've moved all the sporting items we have into the window seat boxes and that really cleared out our storage room. This room is right by the back door so its the perfect location for all our sporting goods. 

Diplomas and other academic items that have been on the floor around the house are finally hung.  

I found adorable blue pillows at Target - On Sale! 


Update: 
I've had a few requests for before and after pictures of this room. 
Before We Purchased the House 


After. 


Monday, November 5, 2012

House Update... One of Many


We have so much going on at the house! So, just a quick update to show you a few of the changes around here.

Mud Room/Front Entry
We found an amazing carpenter who has made a few of my visions come true. I don't need to tell you that there are more then a few pictures of mud rooms on Pinterest that have made me drool. Tonight Chris, our carpenter, finished our mud room in the entry! I still need to install a few hooks under the cubes to finish it off. I love how the shoe rack underneath is hidden. I don't have a before picture, but it was basically a big open space.

 I previously had a shoe rack/bench from Target in the front room, which has found a new home by the back door. In its place is this fun red chest from Ikea. (A huge thanks to my sister, who was visiting and put it together with minimal help from my husband the evening we brought it home.) I'm still debating what should go in it (and on top of it), but I'm loving it as quilt storage for now.


The Nook After
 The Nook 
After my last post about "the nook" I was encouraged to remove the silver vase and insert more picture frames. (Thanks K.A.) I am so glad I listened. I think it is looking much more put together now.
The Nook (from House Tour)

I'm including the picture I took from our house hunting trip because I remember thinking, "what in the world am I going to do with this!" 


 The Great Lighting Switch
I had a friend in town who used to work for Habitat for Humanity. I convinced her to help me (uh... my husband) switch around the lights in the house. Nothing went as planned, so we are just grateful that no one was electrocuted. I did however get new lights in a few places.

Kitchen Fan now in Blue Bedroom
Blue Bedroom Before
 Anyway... the blue fan from the kitchen found its way up into the now blue "big boy" room upstairs. This is good for several reasons, one of which being we don't have central air and a fan on the bedroom level really helps things. We have done minimal work on this room, since H is still in his crib in the nursery, and will be there quite a bit longer. I have repainted the room. (See before picture from our house hunting trip.) My In-laws also repainted all the pockets in all the closet doors that had been painted in the house. I think i want to do roman blinds in this room but need to (a) figure out how and (b) find a good fabric.

New Family Room Light
The lighting in the living room also got an update. This is the only spot for a ceiling fixture in the room, so I needed something that produced more light. Also, the other fixture was blue and there is already a lot of blue in this house. So... out came the blue fixture and in came the new, brighter, more neutral fixture.

Finally the kitchen (which had wires dangling for a few days while we waited for our order to come in) got a more modern, more kitchen appropriate light.  I think this will mark the temporary end to changing out lights. I have two large lights in the front room that I want to replace with something more modern, but the husband has made it very clear he won't be doing that! So I either have to wait till he forgets or, when I can't take it anymore, I will hire someone! In the meantime I'm on the lookout for new fixtures ... a girl can dream.

The Weird Basement Room/Soon to be Office

Basement Room Before (Not our TV)
Thursday's Progress
When we purchased the house there was this small room in the very back of the basement that I had no idea what to do with. You can't tell from this picture, but the wood actually has these little carved leaves all around it and behind it was some sort of cloth wallpaper.

The redeeming factor was that this room has a great little window that looks out over the back yard... perfect! When H is a little older, I would be able to sit in this room while he plays in the yard.

Cue our amazing carpenter and a few pictures from Pinterest.  I'm getting a built in desk, book shelves and WINDOW SEATS.  I'm in love! Here is a little sneak peek of the work so far... although I'm told they are going to be done by the end of the week!

Friday's Progress


Upstairs Playroom
Ikea Lantern
Lots of little changes in this room. The hardware board continues to grow with every Home Depot trip. Our new favorite activity, in addition to our old door bolt, is the level that has been attached to an eye hook. A small pulley system is also now on the side of the board.

Hardware Board
An Ikea lantern and an old plant holder and a electric candle create a fun little lighting situation over the bookshelves.

Ikea Rug
A new rug on the floor brings a forest floor to the playroom and a fun place to play with toys. (H hasn't really noticed yet, but a few older kids that have come over to play have been particularly taken with the animal tracks.)
Zebra Ikea Print

Another great Ikea find is the zebra print for the large wall in the playroom. I saw this in someone's cart at the Ikea and was so in love, I hardly noticed that it would barely fit in my car with my other purchases. Thanks to my sister though, we made it fit.


The Downstairs Playroom
Old Storage Area Understairs
This used to be one of several basement storage areas, but it is soon to be another play area for little H. I don't have firm plans... but today I picked out paint colors and set my husband to work. The woman at the store said she wasn't sure why anyone would want to purchase the colors "fire" and "squash" ... the jury is still out, but with no windows I was hoping for something warm and bright. It's certainly bright... it's wet in the picture and mellows out quite a bit. You will have to stop by again to see the finished project.

Also in my garage are a variety of objects that got several coats of paint today....but you'll have to wait to find out what I have in store for them.

Happy Crafting!


Thursday, October 11, 2012

Our House, Revisited.

Between traveling, visitors and some early snow, we actually found some time to attack a few house projects. My husband likes to call these "my projects" but none of this would get done without his help and in many of these cases, he does most of the work. haha. The house is finally starting to look like ours. (Although I always have more projects up my sleeve.)

Playroom:
Vinyl Decal - Easy to Apply.
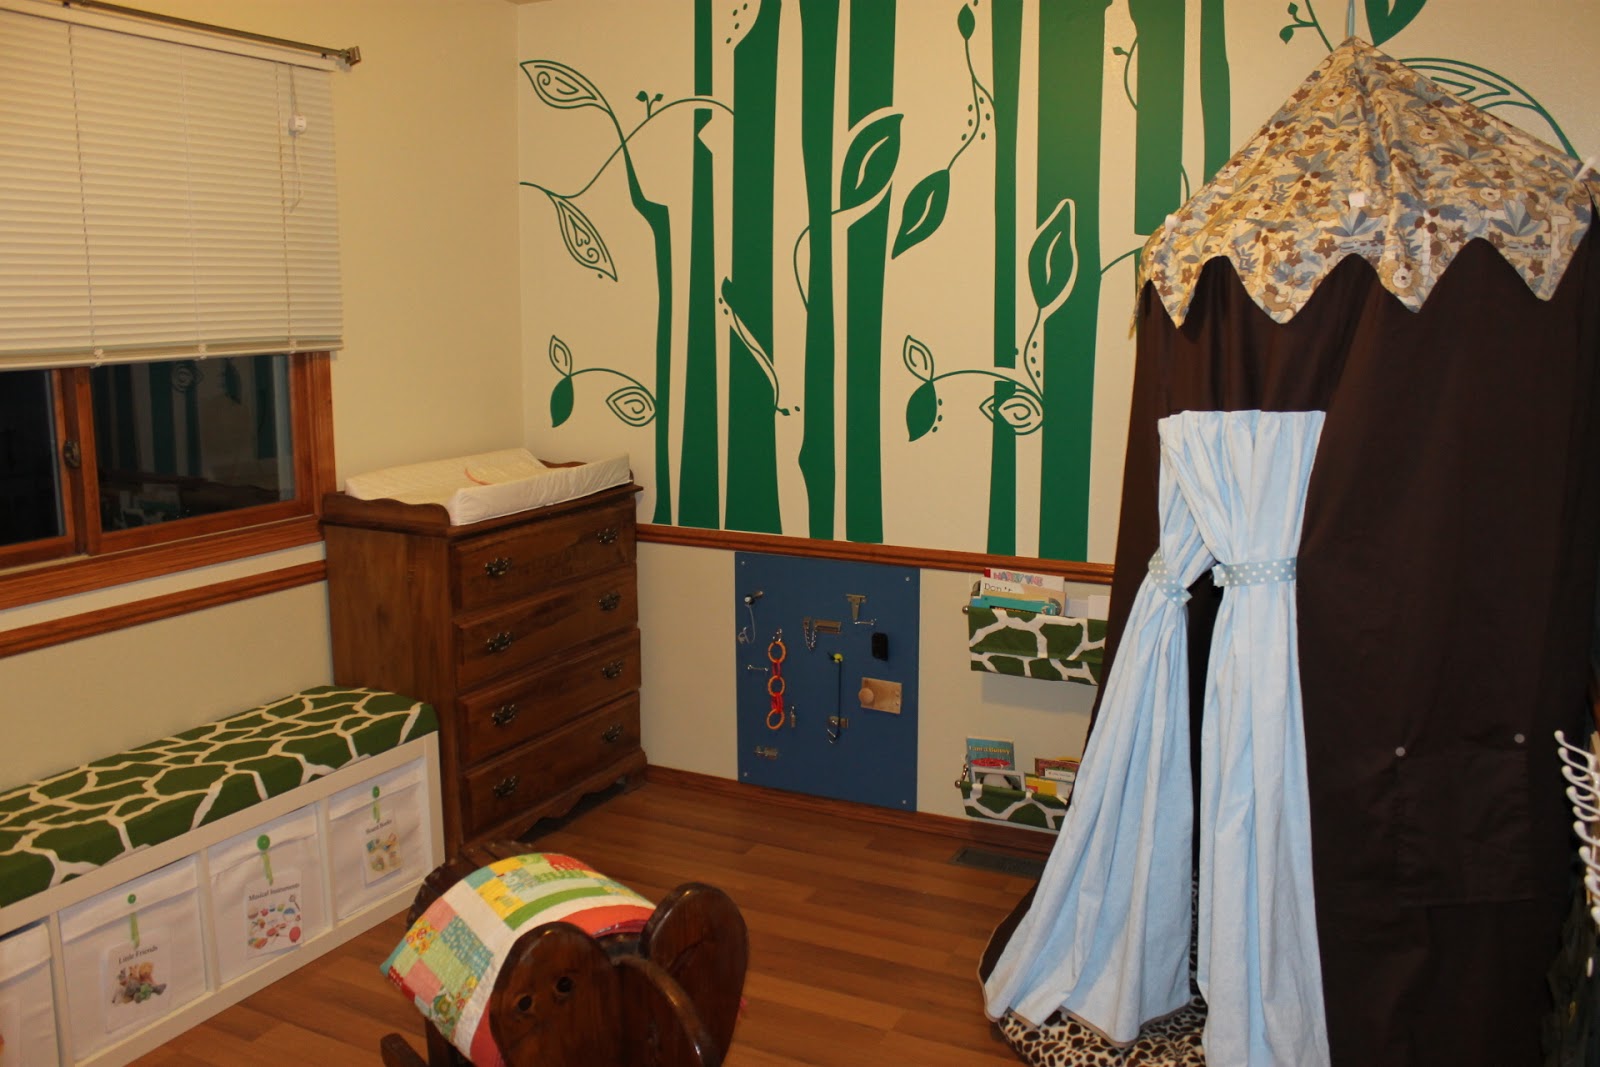
Inspired by I Heart Organizing's birch tree playroom, I set out in search of a stencil or decal that would give it a jungle feel. When this Sissy Little decal came up on Zulily, I jumped on it. I had never worked with a vinyl decal before and it turned out to be easier then I had imagined. The walls in the playroom are textured, and that posed a bit of challenge. The first set of trees we tried to apply as a set of four - that was a mess. Cutting the trees and applying them one by one worked much better. The directions were easy to follow and turned out looking great!

Buttons and Ribbon for Fabric Box Labels
We completed the bench seating a few weeks ago - instructions here. I found fabric bins that I liked at IKEA. I was trying to figure out a way to attach labels to the bins. Velcro did not want to stick and my little one can be pretty hard on items. I found some cute green buttons in a variety of sizes and sewed them on to the front with a small clear button on the back. (The flaps on these bins turn up enough for you to be able to work behind them.) I then printed and laminated labels for each of the bins, hole punched them and used some ribbon to create a loop (using hot glue or a quick stitch) which was then slit and hooked to the small back button. So far so good. We will see if they hold but they look quite cute.

Dress Up Station with Mirrors
 We wanted to create some play stations around the outside of the room. I found some pegs at Home Depot to hang dress-up clothing on. (Please keep in mind my husband installed most of this stuff for me - haha.) I haven't had a chance to make the dress up clothing yet, but I do have this great little ranger vest some dear friends from Edwards gave us. These mirrors are from Wallchart (although I also saw them at Target). Little H loves looking at himself in the lower ones and he will grow to be able to use them all. They were easily hung with the Command picture hanging Velcro tape.

Hardware Activity Board
 My husband put together this great activity board. He has some additional things to add, but with the grandparents coming we wanted to get it up on the wall. We found that little H loves to play with the hardware on our family room coffee table, so this gives him something to play with in his playroom.
(More on this to come, when we get it finished!)

I used the extra fabric from the seating to make some hanging bookshelves. There are lots of instructions for these online. I used towel rods because it seemed easier. I found the towel rods at Amazon.com. I made three pocket shelves in three different sizes to accommodate different sized books.  We ended up hanging the two small ones under the chair rail by the tent and the one large one above the seating. I also added a small pocket to the front of the large one.
Large Towel Rod Bookshelf


Playroom With Tent


Finally - The Tent! I wanted a little fort in the room. Again, there are tons of patterns online. I used a pattern from Simplicity. I had major trouble with the cutting instructions - but was able to just do it my own way with the required fabric. The tent has a great little seating mat and pockets in the back for storing little treasurers.
It hangs from an eye-hook in the ceiling, but we also had to add an additional hook in the back to keep it from rotating sideways. It may actually be easier to just purchase a tent in the future, but it was nice to get the fabric I wanted.

The playroom still needs stuff on the walls and a rug, but it's finally well on its way !


Laundry Room 

Laundry Room Storage
I added some fabric baskets from Target to our laundry room shelves to hold everything. I used some ribbon an card-stock to label the bins. (Since we are cloth diapering, I also have to use the space to dry the diapers when its too cold outside.) This room needs some decoration... I'm still looking for something perfect.


Craft Area
Craft Area.

Hanging Fabric Storage
 This house had the best little craft area in the basement. Unfortunately, once I started setting up, I found that it didn't have a great place to keep fabric. My lovely husband hung some towel rods behind the lowered part of the ceiling. Using pants hangers, I hung my stash fabric so it also blocks some of the sun that comes in through this window in the afternoon. It has freed up quite a bit of much needed shelf space. It also makes me so happy to use my fabric as decoration, because it is so pretty. haha.

We are certainly not done with the house- although we are taking a short break from projects to host Jeff's parents, my sister and my best friend from Atlanta. (Plus a nice break helps me get inspired for my next projects!)

Happy Crafting!

Sunday, September 9, 2012

Making a House a Home

I've finally found a bit of time to share a few of the projects we have undertaken in the first month in Colorado Springs. I have some big "plans"  (aka Pinterest boards galore) for the house and have come to terms with the fact that it is going to take me a while to get everything just how I want it. So far we have had 6 house guests and I've changed a few things between each of their visits.  Also, I've been putting this off because we have been without end tables... but on Saturday we found three perfect ones!

It's my blog, so I only have to show you the rooms I'm done with and you can just wait and see on the other rooms. Without further ado...

The Playroom 

 This is one of the rooms that has a whole Pinterest board dedicated to it, but I am so impressed by how this little project turned out, I had to post it! Here are the instructions from i heart organizing.

My bench is actually one block shorter then the one from Jen's blog. We had an issue with size and covering heating vents. I wanted the bench under the window, so instead of building a wooden corner piece we just overlapped the shelves - we have 9 storage spaces instead of 10. The storage bins are fabric and from Ikea. Jen used the plastic ones from Ikea, but I didn't love the feel of them.  The fabric fit our purpose for now and are better since H is less likely to hurt himself on them.

The pillows are from a previous post and were in the nursery in the last house.  A few items have been re-purposed, including the diaper holder.

We have switched to cloth diapering and love it. However, now I don't need a diaper stacker. It has instead become a place to store some of H's animal friends and it fits our jungle theme for the play room! I have a lot of work left to do in this room, but at least now I have a place to sit while H plays on the floor and have plenty of storage space for toys.

The Family Room 

This is currently my favorite room in the house. I love how we all fit in it. Jeff can be watching football, H playing on the floor and I can sit by the window to read - all without tripping over each other. (Can you tell I was in base housing for too long! haha.)

The major project here was the wooden curtain holder over the big window. (I had to close the shades for the picture, but it has a beautiful view of the mountains.) The former owners had really dark fabrics up on these valances. I loved the polished look of the wood, but hated the fabric choice. In this room I used valances from our old house and reupholsterd it. (Thanks to my husband's staple gun, it was an easy fix.)  I'm not sure about what I want on the mantle yet, and I'm considering finishing the mantle so that it extends to the floor, but for now its nice to have a living space that feels finished.

The Nook 

This little nook is right outside our bedroom. I couldn't figure out what in the world I would do with the nook until I saw this piece of art at Pier One. I'm still debating if I love the vase there, but otherwise I love how well this piece fits there.

The Nursery 

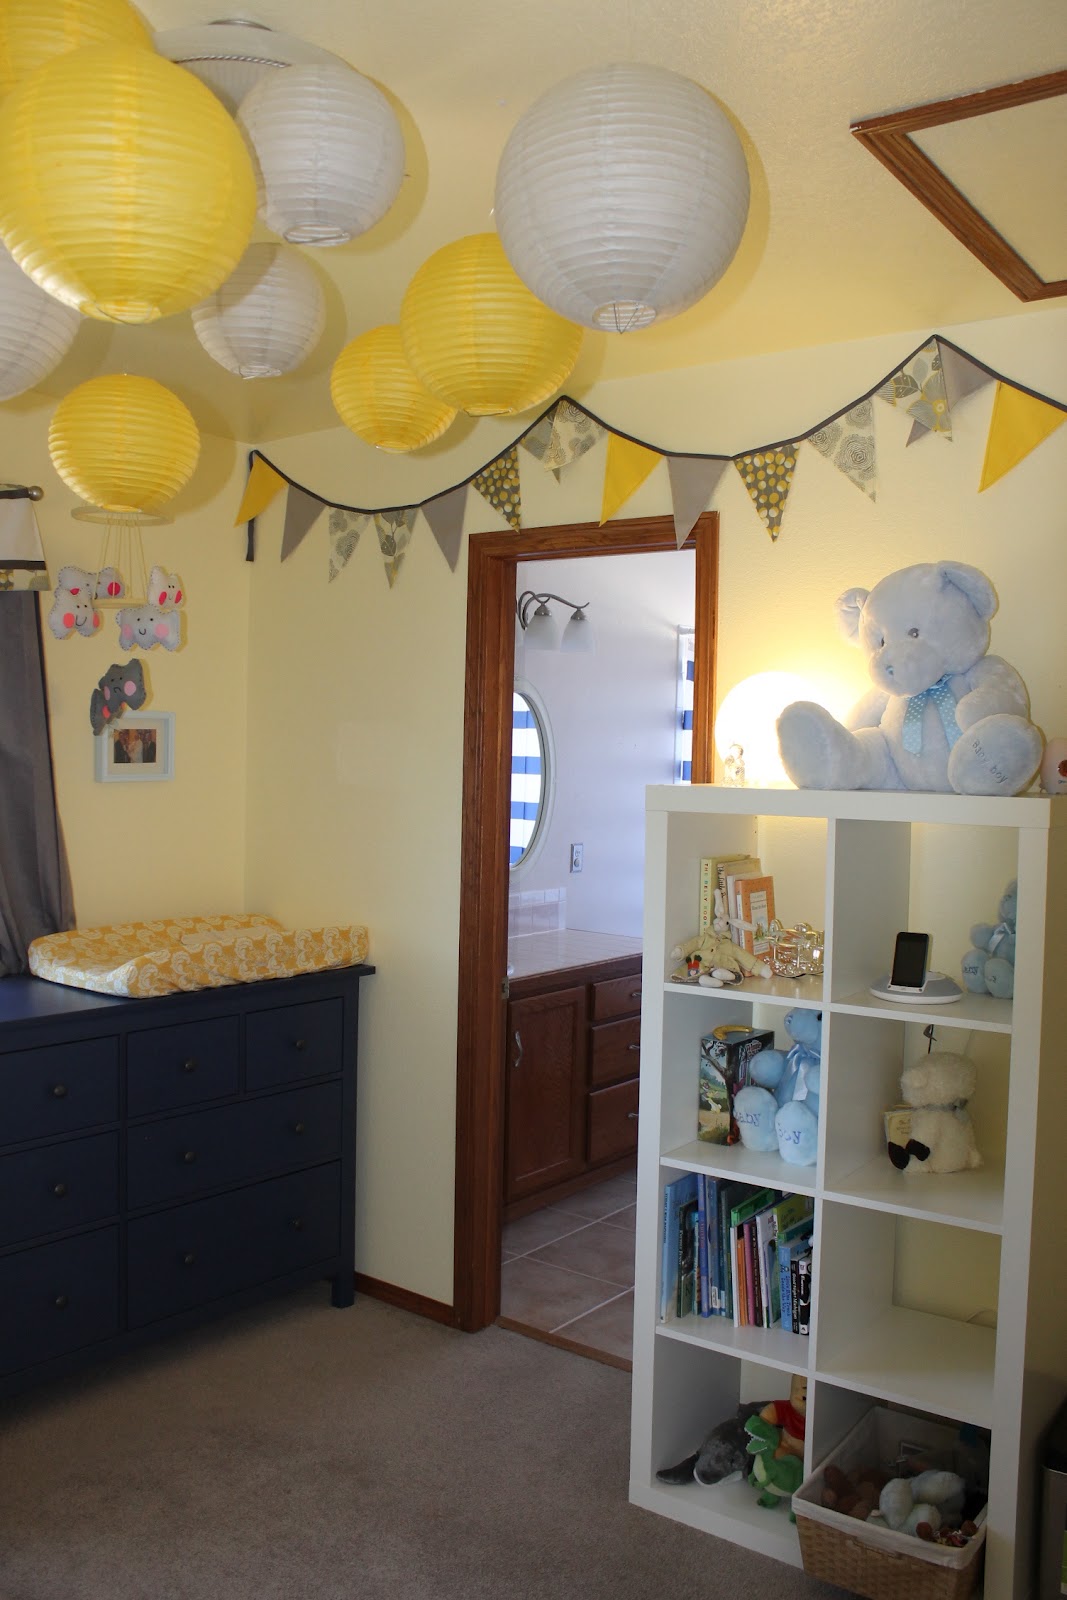
I am so happy with how this room came together. The room was already painted yellow when we got the house. I was able to use a bunch of things that B from Practically Crafty made for my shower. I converted the table runner she made into a valance, I used the flags as wall decor and reused the lanterns.

I love the little collection of things over his crib - from invitations and pictures to little hand written notes, it really brings H's personality to the room. And I know you are not suppose to have bumpers! By 4 months, H was rolling all over the place and we were constantly finding him with an arm or leg between the slats... so bumpers it was. I tried the "breathable bumpers" and hated how they looked and how they felt. H was able to get stuck between them and the mattress because of how they connected. They also said "one size fits all" but we never got them to fit quite right in our crib. These bumpers are excellent and are from Carousel Designs. They are beautiful and lined with the softest fabric - we have had them for a few weeks now and love them.

I have one little spot on the wall there by the bathroom door that needs a little something... too many cute options, so I'm sure I will find something cute.

H's Closet

Another find from I heart Organizing. Jen had used an Ikea Expedit bookshelf to add additional space in her boy's closets. (See her blog for instructions.) We needed the additional storage and hanging room. The built-in wood shelf made the Expedit too tall for this closet. Instead we used the Expedit 2x2 shelf with amazing results. The extra hanging room is perfect and leaves us with four shelves that H will eventually be able to reach. When H is a bit older, I plan to add storage like Jen did in her tutorial.

Here is another close up:


As you can see, we have been quite busy. I have a handful of other projects up my sleeves so I'll keep you posted. I also have been hard at work on H's halloween costume and hope to have a preview of that soon. Until then... Happy Crafting! (and one last picture of H!)